记某app逆向分析

最近热爱健身, 用了一款app, 想分析一下这款app

今天是2025年五月, 我下载了一个历史版本. 大概是 2024年12月的一个版本. 打开app, 提示要更新, 并且是强制更新.

使用 frida hook 看看, nop掉弹窗
1
2
3
4
5
6
7
8
Java.perform(function () {
var Dialog = Java.use("android.app.Dialog");
Dialog.show.implementation = function () {
console.log("[*] 拦截 Dialog.show(),不显示强制更新弹窗");
// 不调用 this.show() 即可屏蔽
return;
};
});
执行完后 黑屏, 有的时候执行完后 确实没有弹窗了, 但是app 其他功能无法使用. 无奈只好换新版本.

这次找到了一个较新的版本. 结果打开后就显示 ‘检测到该应用在hook环境中运行’, 然后程序就退出了.

此时我想 反编译一下 这个app,然后直接nop 掉检测. 于是我 jadx 打开app, 然后我看到了 com.netease.nis.wrapper, 这一款就是加了壳, 网易易盾.

于是我打算脱壳, 但是程序一打开, 不到一秒就直接退出了, 还没来得及暴力搜索 dex呢.

这可怎么办啊, 我想这换一种脱壳方式把?

等等, 过root 检测, 可以试试 Magisk + Shamiko。 我按照操作试了一下, 果然ok了, 程序不会再退出了.

贴上链接

Magisk + Shamiko 过root检测

按照教程 做到 ‘4、开启Shamiko模块’ 这一步 就可以过root检测了

为了防止失效, 我将网页缓存了一份
magisk_root.html

然后我用自己的手机号登录, 发现登录失败, 只能接收语音验证码 继续登录, 但是我的手机并没有收到语音验证.

所以我找了一个 小X分身工具, 结果刚打开, app又退出了, 提示 “检测到在双开app中运行”

我怀疑语音验证的包是不是真的发出去了, 否则我怎么接收不到语音验证呢? 我们抓包看看.
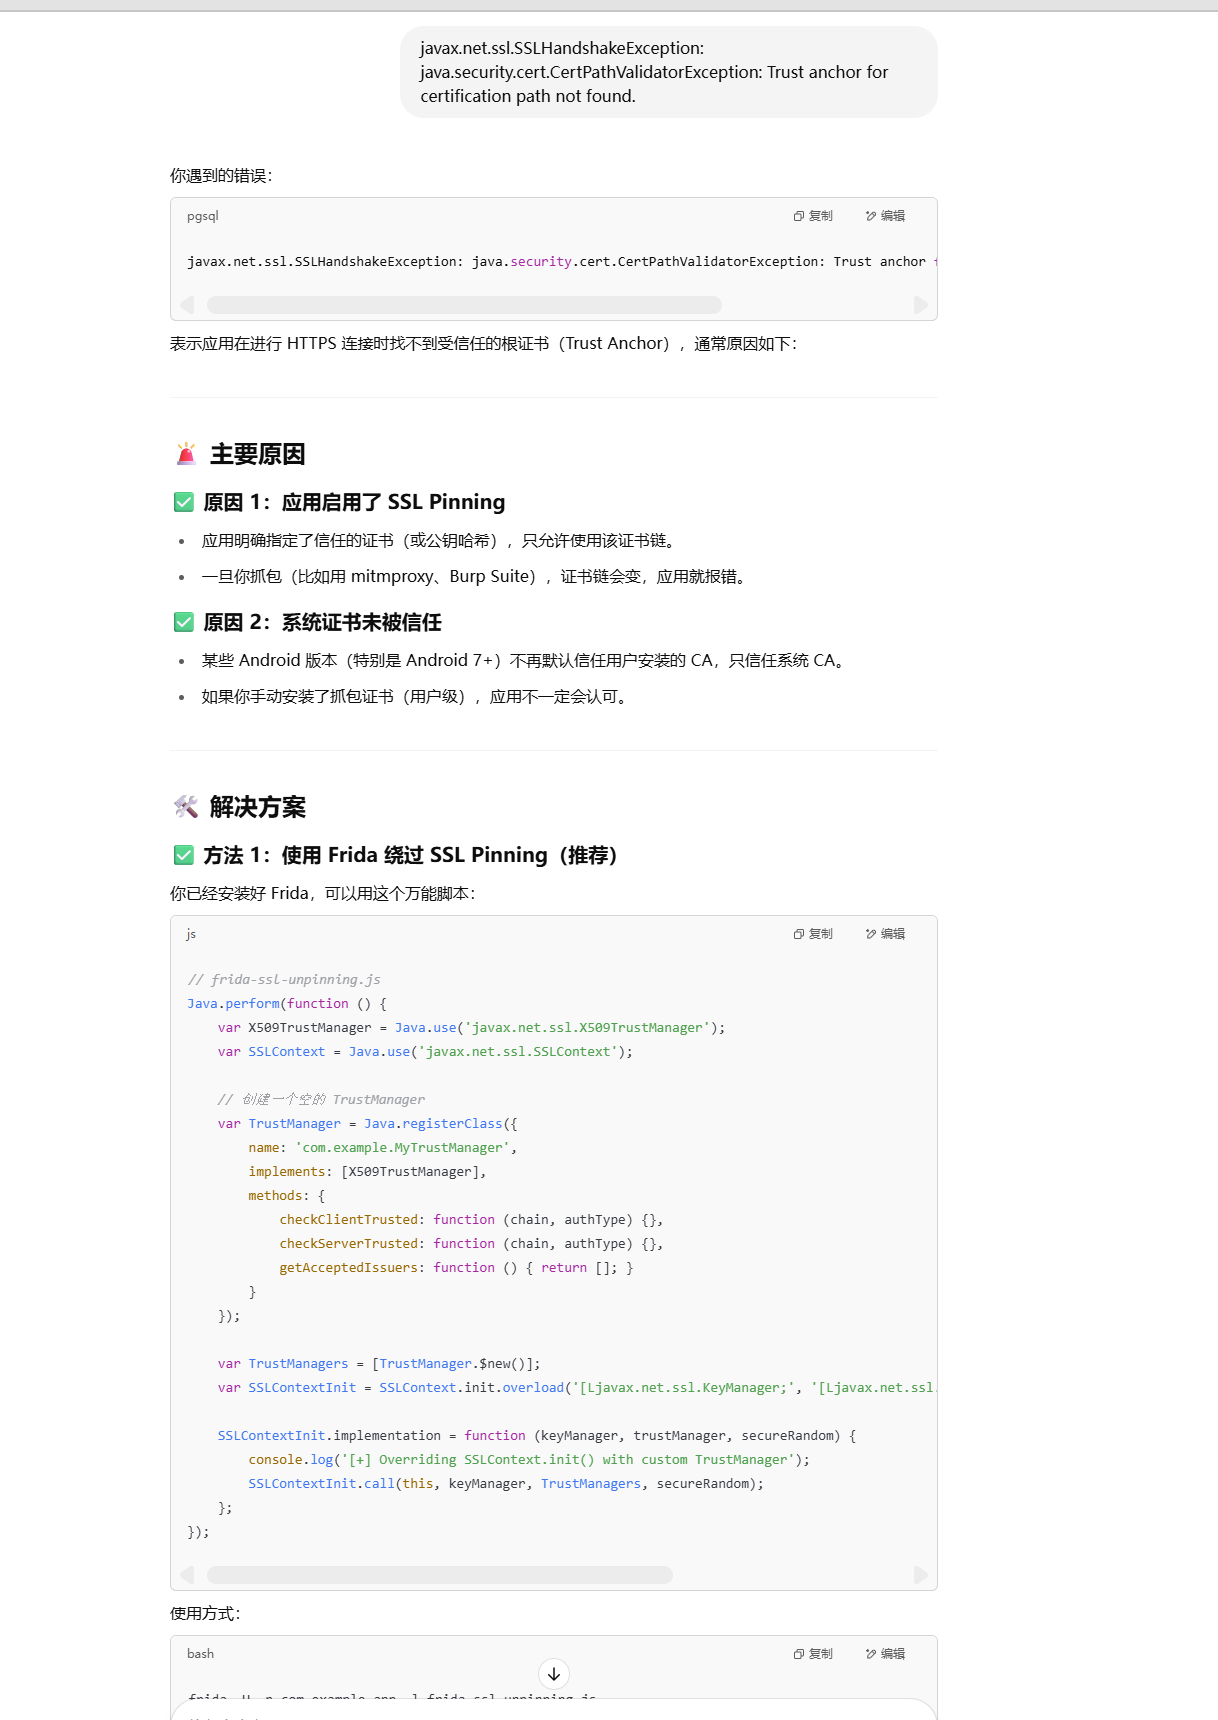
img_11

可能是有 ssl panning

我们用 lsposed 下装个 just trust me 看看.

结果app闪退, 提示 当前app在hook环境中运行.

emmm 还有什么方法能快速分析呢, 试试看 frida 把.
frida hook 结果闪退.

试试看 Strong frida. 结果也是闪退. frida hook 看看是加载了哪个so。然后程序退出的.

1
2
3
4
5
6
7
8
9
10
11
12
var android_dlopen_ext = Module.findExportByName(null, "android_dlopen_ext");
if(android_dlopen_ext != null){
Interceptor.attach(android_dlopen_ext,{
onEnter: function(args){
var soName = args[0].readCString();
console.log(soName);
},
onLeave: function(retval){
Thread.sleep(0.3);
}
});
}

原来罪魁祸首在这里. 这里更加确定是网易的盾了.
img_11

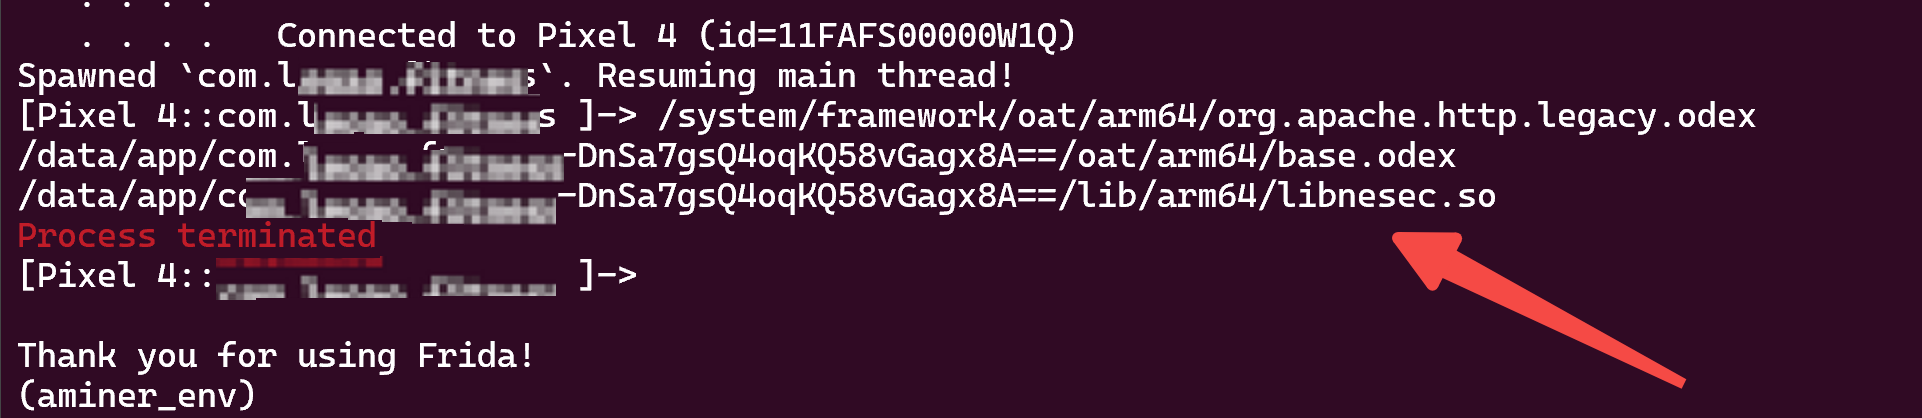
应该是这个so, 检测frida 然后就退出了. 一般 native层都是新开一个线程去检测的. 我们hook libc 的 pthread_create 的方法看看.

1
2
3
4
5
6
7
8
9
10
11
12
13
14
15
16
17
18
19
20
21
22
23
24
25
26
27
28
29
30
31
32
33
34
35
36
37
38
39
40
41
42
43
44
45
46
47
var soaddr = null;
function hook_dlopen(soName = '') {
Interceptor.attach(Module.findExportByName(null, "android_dlopen_ext"),
{
onEnter: function (args) {
var pathptr = args[0];

if (pathptr !== undefined && pathptr != null) {
var path = ptr(pathptr).readCString();
if (path.indexOf(soName) != -1) {

this.hook = true;

}
console.log(path);

}
},
onLeave:function(ret){
if (this.hook = true) {

soaddr = Module.findBaseAddress("libnesec.so");
hook_pthread_create();
}
}
}
);
}
function printNativeStack(context, name) {
var trace = Thread.backtrace(context, Backtracer.ACCURATE).map(DebugSymbol.fromAddress).join("\n");
console.log(trace)
}
function hook_pthread_create() {

Interceptor.attach(Module.findExportByName("libc.so", "pthread_create"), {
onEnter(args) {
var func_addr = args[2]

var offes = func_addr.sub(soaddr);
console.log("The thread function address is " + offes);


}
})
}
setImmediate(hook_dlopen,"libnesec.so");

可以看到, 加载了 libnesec.so 文件后, 这些 pthread_create 依此被调用
img_11

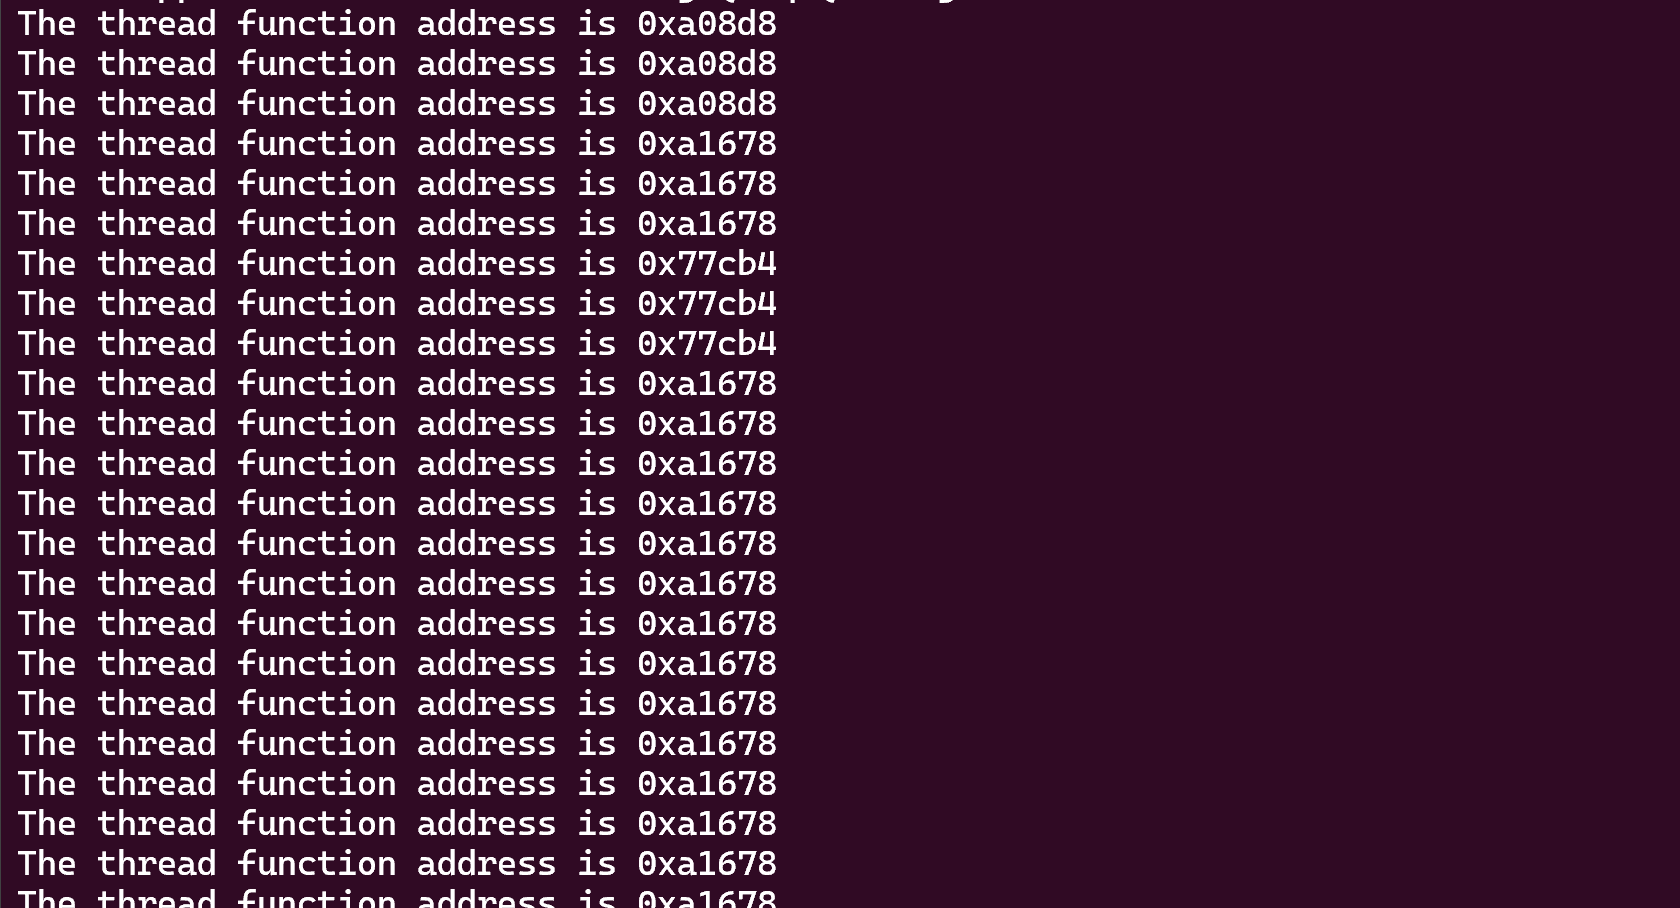
这些线程都有可能是检测frida的线程. 我们从后往前一个个试, patch pthread_create 方法.
我的运气很不好 试到最后一个, 他才是 检测frida 的线程

1
2
3
4
5
6
7
8
9
10
11
12
13
14
15
16
17
18
19
20
21
22
23
24
25
26
27
28
29
30
31
32
33
34
35
36
37
38
39
40
41
42
43
44
45
46
47
48
49
50
51
52
53
54
55
56
var soaddr = null;
function hook_dlopen(soName = '') {
Interceptor.attach(Module.findExportByName(null, "android_dlopen_ext"),
{
onEnter: function (args) {
var pathptr = args[0];

if (pathptr !== undefined && pathptr != null) {
var path = ptr(pathptr).readCString();
if (path.indexOf(soName) != -1) {

this.hook = true;

}
console.log(path);

}
},
onLeave:function(ret){
if (this.hook = true) {

soaddr = Module.findBaseAddress("libnesec.so");
hook_pthread_create();
}
}
}
);
}
function printNativeStack(context, name) {
var trace = Thread.backtrace(context, Backtracer.ACCURATE).map(DebugSymbol.fromAddress).join("\n");
console.log(trace)
}
function hook_pthread_create() {

Interceptor.attach(Module.findExportByName("libc.so", "pthread_create"), {
onEnter(args) {
var func_addr = args[2]
// console.log("sub soaddr", soaddr)
var offes = func_addr.sub(soaddr);
console.log("The thread function address is " + offes);

if (offes == 0xa08d8) {


Interceptor.replace(func_addr,new NativeCallback(function(){
console.log("0x82fac replaces");
},'void',[]));

}


}
})
}
setImmediate(hook_dlopen,"libnesec.so");

ok 现在可以看到 frida没有退出了。

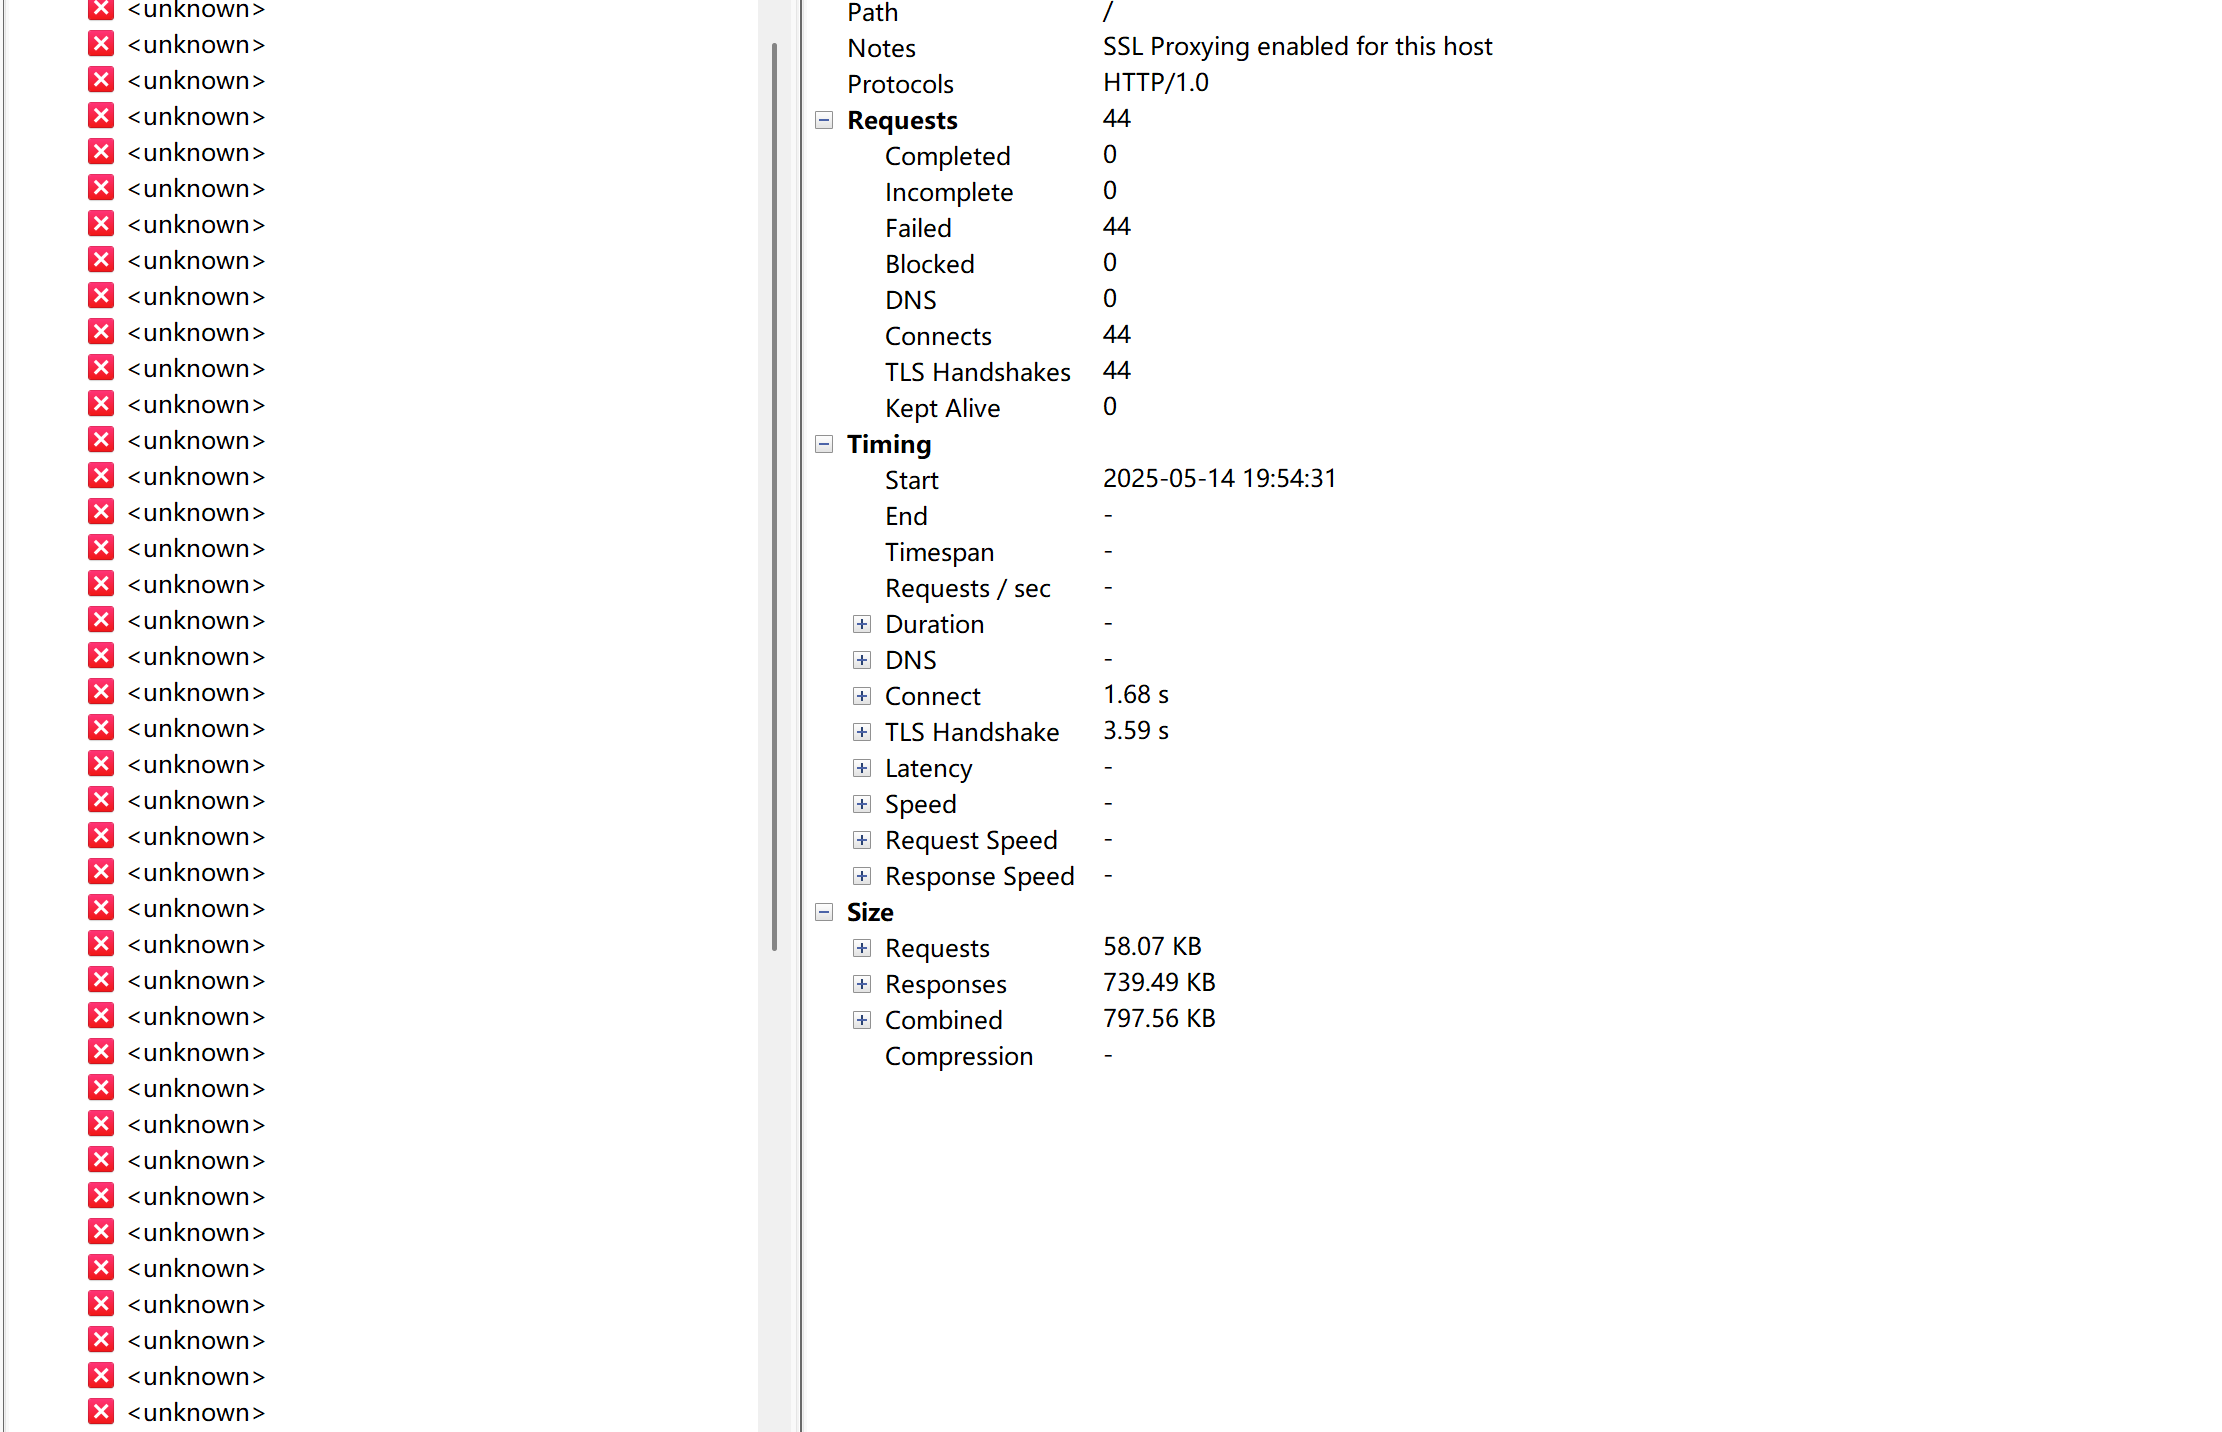
到这里, 发现app还是无法抓包. 我们 adb logcat 看看

1
$ adb logcat | grep 20667 # 过滤 20667 进程的输出.

打印如下

img_11

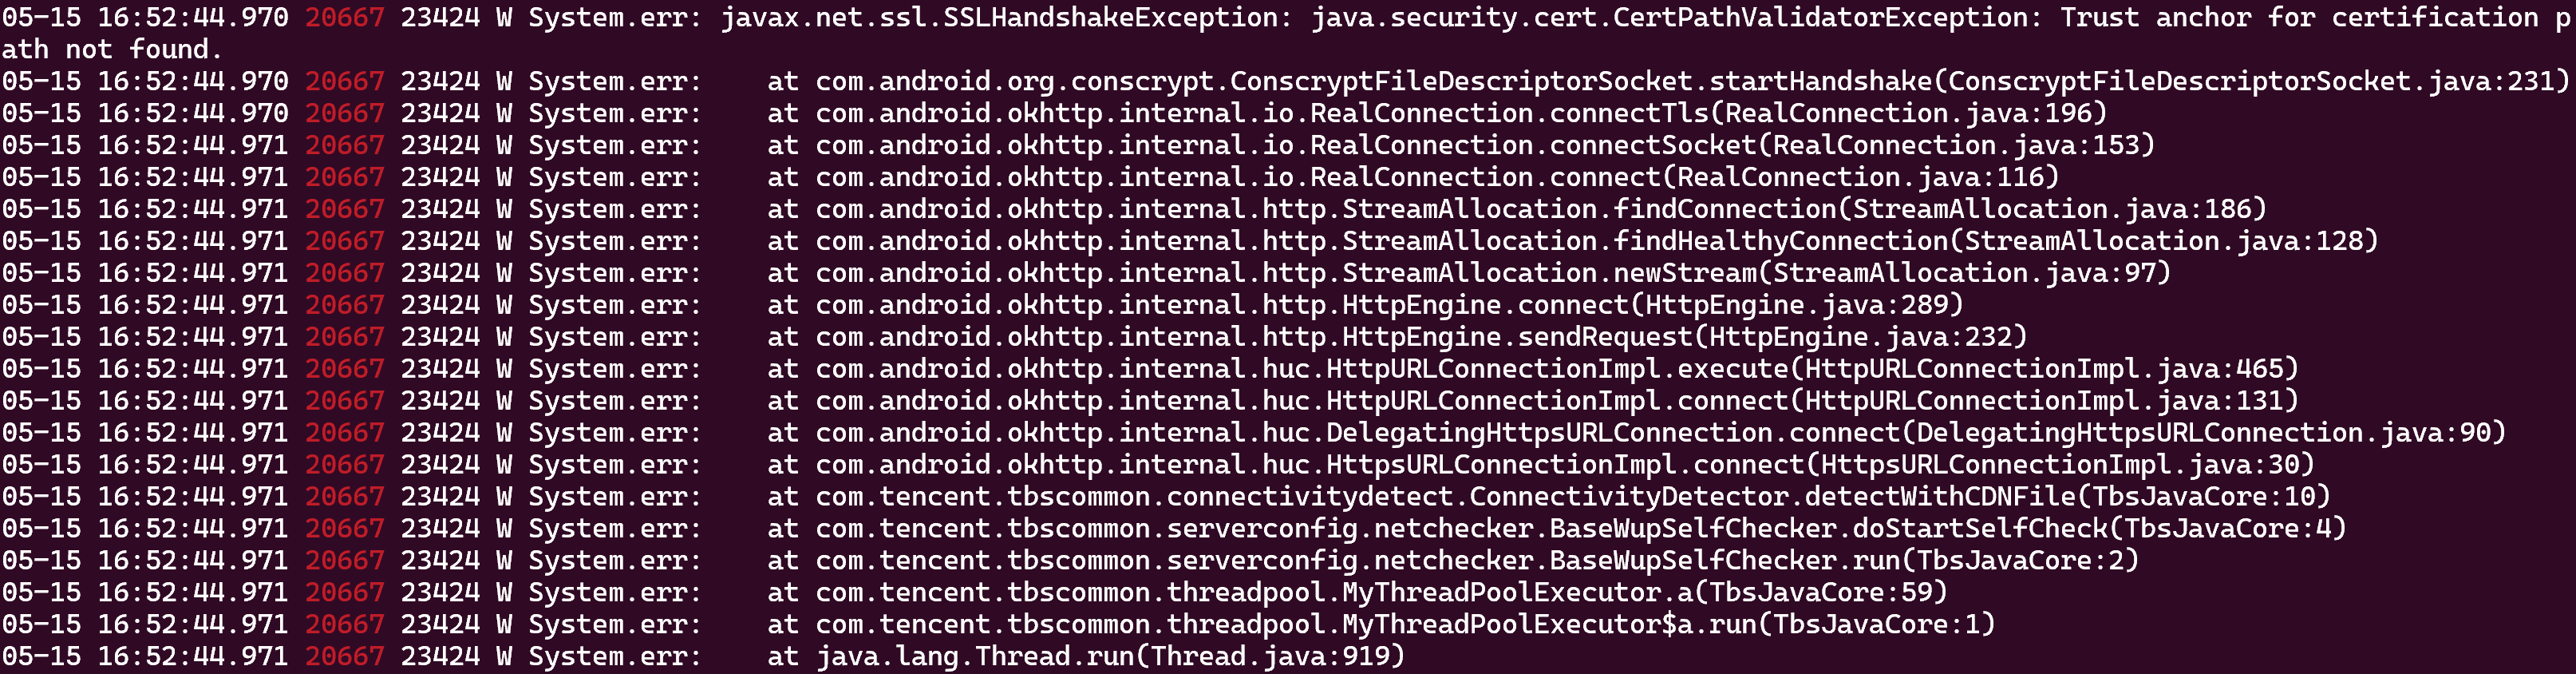
我们把这一段 copy给 chatgpt, 看看它能否帮我们生成frida hook 代码.

img_11

我们就用这段代码试试, 把这段代码插入到 patch thread_create 之后

1
2
3
4
5
6
7
8
9
10
11
12
13
14
15
16
17
18
19
20
21
22
23
24
25
26
27
28
29
30
31
32
33
34
35
36
37
38
39
40
41
42
43
44
45
46
47
48
49
50
51
52
53
54
55
56
57
58
59
60
61
62
63
64
65
66
67
68
69
70
71
72
73
74
75
76
77
78
79
80
81
82

var soaddr = null;
function hook_dlopen(soName = '') {
Interceptor.attach(Module.findExportByName(null, "android_dlopen_ext"),
{
onEnter: function (args) {
var pathptr = args[0];

if (pathptr !== undefined && pathptr != null) {
var path = ptr(pathptr).readCString();
if (path.indexOf(soName) != -1) {

this.hook = true;

}
console.log(path);

}
},
onLeave:function(ret){
if (this.hook = true) {

soaddr = Module.findBaseAddress("libnesec.so");
hook_pthread_create();
}
}
}
);
}
function printNativeStack(context, name) {
var trace = Thread.backtrace(context, Backtracer.ACCURATE).map(DebugSymbol.fromAddress).join("\n");
console.log(trace)
}
function hook_pthread_create() {

Interceptor.attach(Module.findExportByName("libc.so", "pthread_create"), {
onEnter(args) {
var func_addr = args[2]
// console.log("sub soaddr", soaddr)
var offes = func_addr.sub(soaddr);
// console.log("The thread function address is " + offes);

if (offes == 0xa08d8) {


Interceptor.replace(func_addr,new NativeCallback(function(){
console.log("0x82fac replaces");
},'void',[]));


Java.perform(function () {
var X509TrustManager = Java.use('javax.net.ssl.X509TrustManager');
var SSLContext = Java.use('javax.net.ssl.SSLContext');

// 创建一个空的 TrustManager
var TrustManager = Java.registerClass({
name: 'com.example.MyTrustManager',
implements: [X509TrustManager],
methods: {
checkClientTrusted: function (chain, authType) {},
checkServerTrusted: function (chain, authType) {},
getAcceptedIssuers: function () { return []; }
}
});

var TrustManagers = [TrustManager.$new()];
var SSLContextInit = SSLContext.init.overload('[Ljavax.net.ssl.KeyManager;', '[Ljavax.net.ssl.TrustManager;', 'java.security.SecureRandom');

SSLContextInit.implementation = function (keyManager, trustManager, secureRandom) {
console.log('[+] Overriding SSLContext.init() with custom TrustManager');
SSLContextInit.call(this, keyManager, TrustManagers, secureRandom);
};
});

}


}
})
}
setImmediate(hook_dlopen,"libnesec.so");

然后我们 执行

1
$ frida -U -f com.xxx.xxxx -l hook.js

发现charles 可以正常抓包了.

想脱壳试试, 反正目前frida 也可以正常使用了.

试了 hook openMemery 似乎失败了, android 10 下签名变了.

1
2
3
4
https://github.com/hluwa/frida-dexdump
frida-dexdump -FU

成功脱壳.
补充 最近遇到了一个 360的壳. 没有anti-frida

先使用 frida-dexdump 脱壳.

1
frida-dexdump -FU

部分报错

1
2
3
4
5
6
7
8
9
10
11
12
13
14
15
16
17
ERROR:frida-dexdump:[-] Error: access violation accessing 0x7b6f5e7000
at <anonymous> (frida/runtime/core.js:145)
at memorydump (src/search.ts:41)
at call (native)
at <anonymous> (frida/runtime/message-dispatcher.js:11)
at o (frida/runtime/message-dispatcher.js:23): {'addr': '0x7b6f4241e0', 'size': 6738564}
Traceback (most recent call last):
File "/home/chilly/zhipu/aminer_crawler/aminer_env/lib/python3.8/site-packages/frida_dexdump/__main__.py", line 81, in dump
bs = self.agent.memory_dump(dex['addr'], dex['size'])
File "/home/chilly/zhipu/aminer_crawler/aminer_env/lib/python3.8/site-packages/frida_dexdump/agent/__init__.py", line 24, in memory_dump
return self._rpc.memorydump(base, size)
File "/home/chilly/zhipu/aminer_crawler/aminer_env/lib/python3.8/site-packages/frida/core.py", line 180, in method
return script._rpc_request(request, data, **kwargs)
File "/home/chilly/zhipu/aminer_crawler/aminer_env/lib/python3.8/site-packages/frida/core.py", line 86, in wrapper
return f(*args, **kwargs)
File "/home/chilly/zhipu/aminer_crawler/aminer_env/lib/python3.8/site-packages/frida/core.py", line 497, in _rpc_request
raise result.error

jadx 打开发现, 只脱下了一些非源代码的三方包.

接着试试 FRIDA-DEXDump

保证apk 运行, 然后执行如下脚本

1
python3 main.py

发现报错如下

1
2
3
4
5
6
7
8
9
10
11
12
13
14
15
16
17
18
[Except] - Error: access violation accessing 0x7b6f5dc000
at <anonymous> (frida/runtime/core.js:145)
at memorydump (/script1.js:110)
at call (native)
at <anonymous> (frida/runtime/message-dispatcher.js:11)
at o (frida/runtime/message-dispatcher.js:23): {'addr': '0x7b6f4243a0', 'size': 6738564}
[Except] - Error: access violation accessing 0x7b6f5dc000
at <anonymous> (frida/runtime/core.js:145)
at memorydump (/script1.js:110)
at call (native)
at <anonymous> (frida/runtime/message-dispatcher.js:11)
at o (frida/runtime/message-dispatcher.js:23): {'addr': '0x7b6f424bf0', 'size': 7375508}
[Except] - Error: access violation accessing 0x7b6f5dc000
at <anonymous> (frida/runtime/core.js:145)
at memorydump (/script1.js:110)
at call (native)
at <anonymous> (frida/runtime/message-dispatcher.js:11)
at o (frida/runtime/message-dispatcher.js:23): {'addr': '0x7b6f424c60', 'size': 4650360}

跟 frida-dexdump 效果差不多.

最后我们试试 frida_dump

1
$ frida -U -f com.xxxxxxx  -l dump_dex.js

jadx 打开后发现成功脱壳.